Kamis, 25 November 2010

Istilah dalam grafis TV

Station Bug : Logo kecil identitas stasiun TV overlay di pojok layar.


Lower 3rd/CG lower third/Telop/title : Keterangan gambar/video di sepertiga bawah layar. Biasanya mengiringi berita yang sedang berlangsung


Subtitle : Terjemahan gambar di 1/3 bawah layar


Superimpose : gambar/object overlay di layar depan video, materi bisa berupa: Station bugs, iklan selipan, logo tema HUT, promo acara, dsb

Ticker : kutipan berita yang berada di bawah layar, independen, tidak berkaitan dengan gambar yang ditampilkan.


Crawling/Running text : overlay graphic berupa teks berjalan horizontal.

Rolling text : overlay graphic berupa teks berjalan vertikal.

Station ID : Motion graphic sebagai Identitas stasiun TV


Bumper in/out : motion graphic yg berfungsi sebagai pemisah jeda/break dengan acara


OBB/Opening Billboard : Motion Graphic yang berfungsi sebagai pembuka acara


CBB/Closing Billboard : Motion Graphic yang berfungsi sebagai penutup acara


Sting : Still graphic sebagai pembatas antar jeda komersial.

Flash Bumper : motion graphic pendek sebagai pembatas dalam segmen acara

Credit title : teks berisi daftar person di balik pembuatan acara, biasanya di akhir acara.

Over The Shoulder/OTS : graphic ilustrasi tema berita yang overlay di samping bahu presenter

Senin, 22 November 2010

REUNI SMUNSA angkatan 2000


Reuni SMUNSA Depok angkatan 2000, di Griya Ageng Salasar Depok. Tanggal 17 Oktober 2010.
Setelah sepuluh tahun tak bersua..., acara ini sangat berarti sekali. hiks!
Thanks berat untuk panitia yang sudah menyempatkan waktunya untuk mengadakan acara ini.
Oia..., sukses juga untuk ILUNI-nya. Semoga bermanfaat untuk alumni dan siswa-siswi SMUN 1 Depok.


*Setelah molor sekian lama... Akhirnya kuselesaikan juga. Maafkan atas keterlamabatannya ya teman2... :)*

NB: sori gambarnya agak pecah, karena koneksi inet yg kurang canggih. Harap maklum!

Sabtu, 13 November 2010

Sony Meluncurkan Super 35mm Digital

Sony baru-baru ini meluncurkan PMW-F3,  kamera digital yang dilengkapi dengan Super 35mm Imager.
Kamera ini dirancang untuk berbagai keperluan termasuk dokumenter, TVC, pemerintahan, pendidikan, televisi, dan film. Kualitas dan harga juga menarik bagi pembuat film independen, mengingat basis daftar harga $ 16.000. Bila digabungkan dengan PL-lensa kit murah yang kompatibel dengan 35/50/85mm T2.0 fixed focal lenses, dan memungkinkan untuk lebih dari itu.
Berbasis Sony EX XDCAM, F3 menggunakan SxS ExpressCard media format. Super 35mm CMOS Imager menawarkan sensitivitas tinggi, noise rendah dan dynamic range lebar. Sebuah HD-SDI output dual-link memungkinkan rekaman untuk di "inter-cut" dengan materi dari F35 Sony atau model SRW-9000PL.
Tersedia Format rekaman termasuk 1920x1080, 1440x1080 dan 1280x720. Pengguna juga dapat mengambil keuntungan dari "slow" dan "quick" recording, dari 1 hingga 30 fps di 1920x1080 (17 sampai 30 fps dalam mode dual-link) dan 1 sampai 60 fps di 1280x720 (17-60 fps dalam mode dual-link ).

Diluncurkan februari 2011

Spidercam buat tayangan lebih “hidup”

Pelaksanaan Piala Dunia 2010 di Afrika Selatan tak hanya menarik dari sisi kualitas para pemain maupun permainan bola yang cantik. Selama pertandingan berlangsung, rupanya ada juga hal yang menarik untuk disimak. Yaitu view atau pengambilan gambar selama pertandingan berlangsung.

Terkadang, view bergerak cepat dari atas lapangan lalu ke arah pemain atau ke arah gawang maupun ke arah penonton dan pelatih, sehingga penonton televisi atau layar lebar seolah ikut bergerak. Sesekali pula, terlihat tayangan gerakan sangat lambat aksi lihai pemain saat mengecoh lawan ketika menggiring bola.

Hal itu bisa disaksikan para penikmat sepak bola berkat kecanggihan kamera yang digunakan. Situs indonesiangamer.com menyebutkan penyelenggara ternyata menggunakan kamera video jenis Phantom V640 dan perangkat kamera yang disebut dengan istilah spidercam, untuk memanjakan mata penonton.


Kecanggihan yang dimiliki Phantom V640 adalah merekam gambar dengan kemampuan 2.700 fps (frame per second). Pada umumnya, kemampuan kamera merekam hanya 24 fps hingga 60 fps. Teknologi high speed camera inilah yang membuat penonton bisa menyaksikan gerakan ultra slow motio atau sangat lambat.


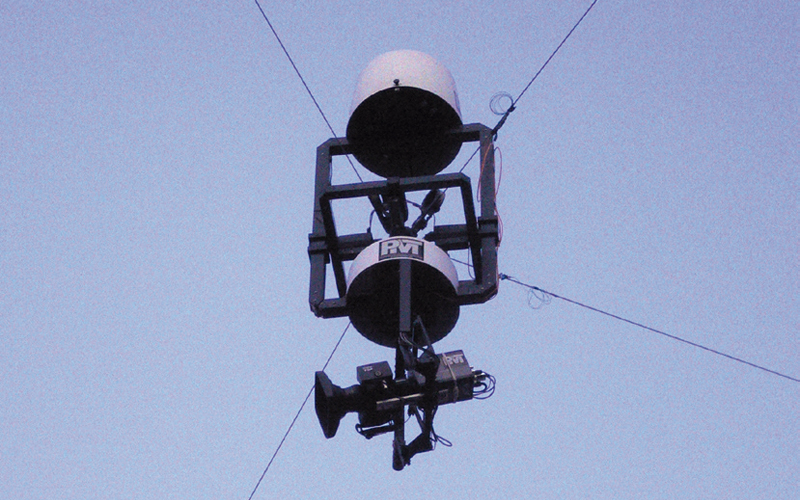
Sedangkan perangkat spidercam, digunakan untuk menghasilkan view tiga dimensi atau 3D dari sebuah pertandingan. Spidercam, seperti dikutip dari spidercam.org, merupakan perangkat kamera yang mampu bergerak tanpa dibatasi oleh kendala di atas tanah. Kamera ini dengan mudah dan dengan tenang mengikuti perintah pilot atau operator. Teknologi inilah yang membuat penonton menjadi lebih dekat dengan lapangan, sehingga bisa melihat pergerakan pemain.


Pengoperasiannya menggunakan empat motor derek yang ditempatkan di setiap sudut lapangan. Operator menggunakan remote control untuk menggerakkan kamera yang dipasang pada kawat baja, dengan menggunakan sistem robot. Pergerakan bukan hanya pada kamera, tetapi juga pada penggeraknya. Hal inilah yang memungkinkan kamera mengambil angle atau sudut pengambilan gambar dari berbagai titik.

Tahun ini, pengambilan gambar untuk masing-masing pertandingan dilakukan dengan 30 kamera standar, lebih banyak empat kamera dibandingkan Piala Dunia 2006 di Jerman. Jumlah itu termasuk dua ultrakamera yang mempunyai kemampuan merekam lebih dari 1.000 frame per detik, guna mendapatkan gambar lambat yang dramatis kala pengulangan.

Tak hanya itu, penyelenggara juga menempatkan tak kurang dari 20 piranti element technica quasar yang merangkai kamera Sony HD dan lensa Canon. Perangkat kamera ini digunakan di delapan posisi kamera 3D di Ellis Park dan Stadion Soccer City di Johannesburg.

Sebelum ini, Spidercam telah digunakan dalam ajang Piala Champion dan beberapa pertandingan internasional lain, seperti renang, rugby, dan tenis. “Ada perbedaan besar antara lapangan sepak bola dengan penggunaan kamera ini dalam studio. Kami selalu berusaha mengetahui apa pun yang terjadi (di lapangan), namun kami harus memastikan setidaknya berjarak 20 meter agar aman dari bola

10 Tips untuk untuk para editor


Sebelum melakukan produksi atau pengambilan gambar, ada banyak hal yang perlu dilakukan oleh editor untuk diselesaikannya pada awal produksi. Selain sistem pengeditan itu sendiri, berikut adalah 10 hal penting yang seharusnya dilakukan oleh para editor

1. Samakan visi anda dengan sutradara / produser / klien. - pahami pikiran mereka tentang proyek.yang akan dilakukan bagaimana mereka melihatnya secara kreatif? Jangan lupa memahami storyboard dan dokumen lain yang dibuat sebelum produksi.

2. Jangan pernah meremehkan pertemuan pra-produksi,

3. Bergabunglah dengan kru produksi Anda. - Apakah itu pada pertemuan pra-produksi atau di lokasi syuting, berbicara dan bertukar pikirlah dengan sutradara direktur fotografi, kameraman, teknologi digital imaging , artistik, audioman, lightingman, penulis script dll

4. Jika produksi anda direkam pada media memory / hardisk – siapkan computer /laptop untuk mentransfer hasil rekaman anda, karena memory untuk kamera sangat terbatas sesegera mungkinlah mentransfer data anda setelah pengambilan beberapa shot, dan yang terpenting segera buatkan backup untuk mengantisipasi segala kemungkinan

5. Mengatur materi editing. - Mengedit adalah proses kontinuitas penggabungan materi syuting dan memberi sentuhan artistik, efek visual maupun grafis / animasi dengan memiliki asisten setidaknya memberikan kemudahan bagi anda

6. Buatlah catatan untuk film anda - Buatlah catatan terperinci tentang pengambilan gambar. lighting , audio dsb. Proses ini sedikit memakan waktu tapi demi kepuasan di kemudian hari, terutama jika Anda memiliki banyak rekaman dan atau jadwal produksi yang panjang.

7. Mulai mengoreksi rekaman./ hasil edit anda - Jika ada yang benar-benar tak layak pakai jangan segan-segan untuk tidak menggunakannya

8. Buat database yang representatif - Detail informasi tentang semua / Anda suara grafis / visual effect / atau unsur-unsur musik. lainnya

9. Diskusikan dengan sutradara, produser ataupun music director tentang pemilihan ilustrasi musik. - Jika mereka tidak memiliki preferensi, biarkan naluri anda.yang bermain

10. Periksa Timeline Anda. - Selalu, lakukan ini setiap sebelum pemutaran. Pastikan semua trek yang sinkron dan tidak ada jump picture / jump cat atau offline audio. Pastikan bahwa semua efek yang membutuhkan rendering telah terlaksana

DASAR-DASAR EDITING FILM

PENGERTIAN DASAR
Editing adalah proses merangkai gambar demi gambar yang akhirnya kemudian menjadi satu kesatuan cerita yang utuh dan penonton dapat dengan jelas memahami maksud dari sebuah program.

Ketika memulai editing hendaknya seorang editor harus memahami ide dari program yang akan dibuat :
• Tema dasar program
• Plot atau alur cerita, bagaimana cerita berkembang dari awal sampai akhir
• Apa yang kita harapkan dari penonton agar ikut merasakan dan mengalami program yang disajikan
• Memilih bagian mana yang harus dibuang atau dipakai dalam rangka program itu sendiri
• Pesan utama dari program harus bisa nampak.

Syarat yang penting dalam editing adalah kesinambungan cerita; dengan menyajikan kesinambungan gambar dan suara sekaligus. Perlu juga diperhatikan irama dari sebuah adegan / peristiwa, hubungan antara gambar yang satu dengan gambar berikutnya. Penonton diharapkan untuk tidak merasakan bahwa program yang dilihatnya adalah merupakan potongan gambar dan suara yang disambung-sambung namun merupakan rangkaian kejadian. Editing erat kaitannya dengan hasil pengambilan gambar dari seorang kameraman. Dengan hasil gambar yang baik maka akan lebih mudah bagi editor untuk merangkai gambar / shot.
JENIS PERPINDAHAN SHOT
1. CUT
Adalah perpindahan langsung dari gambar ke gambar berikutnya secara tajam. Fungsi cut adalah untuk mempertunjukkan :
• Kesinambungan action Apabila satu kamera tidak dapat mengikuti gerakan obyek dikarenakan terhalang obyek lain misalnya, kita potong dan ganti dengan jenis shot lain yang melanjutkan gerakan tersebut.
• Detail dari sebuah obyek Misalkan ada sebuah long shot seorang sedang menulis, kemudian kita pindah ke close up untuk memperlihatkan apa yang sedang ditulis.
• Progresi atau peningkatan dan penurunan kejadian Cut dari long shot ke close up akan meningkatkan progresi karena penonton dibawa untuk melihat sesuatu dengan lebih jelas dan detail, dan demikian juga sebaliknya.
• Perubahan tempat dan waktu Perubahan dari sebuah adegan di dalam ruangan ke luar. Peristiwa lain yang terjadi bersamaan tapi berada di lain tempat.
• Menciptakan irama kejadian Cut secara cepat akan menaikkan irama kejadian, demikian juga sebaliknya.

Macam-macam jenis cutting :
• Insert / cut in Adalah sebuah shot yang diselipkan di shot utama yang berfungsi untuk memperlihatkan detail dari shot utama.
• Intercut / cut away / reaction shot Shot action yang diambil pada saat yang bersamaan dengan shot utama sebagai reaksi terhadap shot utama.

2. DISSOLVE
Adalah perpindahan shot secara berangsur-angsur; akhir dari shot pertama lama –lama hilang dan berganti dengan awal dari shot ke dua. Dissolve hanya bisa dilakukan dengan dua sumber gambar. Pada umumnya digunakan sebagai jembatan penghubung atau transisi dari shot action, pergantian tempat dan waktu.

3. FADE
Biasanya digunakan pada awal atau akhir adegan.
• Fade from black Gambar muncul dari layar hitam, menunjukkan awal dari adegan.
• Fade to black Gambar menghilang ke layar hitam, menunjukkan akhir adegan.

4. WIPE
Efek dimana sebuah shot disapu oleh shot yang lain, hingga shot pertama nampak keluar dari layar.

EDITING NON LINEAR
Yang dimaksud dengan editing non linear adalah editing atau pemotongan gambar yang tidak terikat oleh urutan susunan shot atau gambar yang telah kita masukkan, sehingga dimungkinkan adanya perubahan urutan tanpa merekam kembali sisa dari shot yang telah dimasukkan. Saat ini telah banyak sekali beredar hardware editing card yang beredar di pasaran dengan segala macam spesifikasinya. Dan telah dimungkinkan pula bagi seseorang yang hanya mempunyai sebuah PC biasa menjadikannya sebagai alat editing non linear.

Prinsip – prinsip editing
• Jangan menyambung gambar dengan cutting, dissolving, wipe tanpa ada alasan yang jelas. • Jangan menyambung dua shot dari obyek yang sama dengan framing yang sama karena akan menghasilkan jump cut.
• Jangan menyambung dua jenis shot yang ukurannya terlalu ekstrim, misalkan dari ELS ke CU, karena hal ini akan menyebabkan penonton kesulitan untuk mengenali obyek yang dimaksud.
• Jangan menyambung shot dari obyek yang sama dengan arah yang berlawanan karena akan menghasilkan crossing the line, yaitu tidak bertemunya arah pandang dari obyek. Apabila kita mengambil gambar dua orang yang berhadapan maka akan muncul garis imajiner yang membatasi obyek, seorang kameraman juga harus mengetahui tentang garis imajiner ini atau yang sering disebut garis axis.
• Jangan menyambung di tengah shot ketika kamera sedang bergerak. Juga jangan menyambung shot kamera bergerak dengan kamera berhenti.

Sebenarnya masih banyak prinsip – prinsip editing yang harus kita pelajari , antara lain melalui latihan dan belajar dari kesalahan.
Sekali lagi perasaan artistik seorang editor sangat dibutuhkan; di mana dia harus memotong gambar dan suara pada titik yang tepat agar penonton merasakan bahwa semuanya adalah satu kesatuan.

Pemahaman & Arti sebuah Codec Serta Tips Video File

Arti CODEC = “COmpressor/DECompressor”. Setiap compress(to encode) video-file memerlukan suatu “codec” untuk men-decompress setiap frame agar bisa berfungsi sewaktu playback. Ada cukup banyak sih codec yang beredar. Sebaliknya tentu kita bertanya buat apa sih codec² ini, kan Windows sendiri sudah punya DirectX. Soalnya ada beberapa codec yang tidak kompatibel dengan DirectX, dan agar DirectX bisa akses & match dengan program parameternya untuk itu perlu kiranya kita download dan install beberapa codec[boleh/tidak harus berikut decoder], agar hasil encoding dengan codec tsb oleh Windows bisa ditampilkan kembali/to decode oleh sebuah decoder, player/converter tanpa mengurangi kwalitas gambar secara tetap utuh serta kapasitas muat yang kecil.
Attention: Bila Anda meng-install sebuah codec, untuk bisa menjalankan hasil encode tsb pada PC lain harus idem ter-install encoder/codec yang sama pula !!
Kenapa perlu harus codec? Seperti diketahui umumnya Video-file kan muatannya besar sehingga perlu decompress jadi muatan kecil, serta suatu ketika memudahkan untuk backup, atau melakukan transfer film/video transfer file via email/Internet atau barangkali ke HandPhone?. Di samping itu bila Anda mempunyai Digital Camcorder untuk membuat home-movie agar bisa dapat muatan yang banyak, sebab ada beberapa Clips (mis sebuah file VOB) dengan durasi pendek bisa meliputi sampai Gigabytes. Kendala yang selalu menghantui para pemilik HP/Home-movie Maker menghadapi kapasitas HD kecil yang sangat terbatas. Maka menggunakan ”codec adalah salah satu solusi” agar kendala tsb teratasi dengan mudah.
Catatan: Codec tidak hanya ada buat video (video editing, video transfer, dsb), kalau ada Video Codec berarti adapula Audio Codec (masing² punya codec sendiri-sendiri).
Pada Windows Anda dapat lihat/check sebelum install pada PC sendiri daftar codecs apa saja yang dipunyai pada Device Manager > dobelklik Sound, video and game controllers > dobelklik Audio Codecs/Video Codecs > Properties.
Contoh beberapa ‘codecs terkenal‘(diluar bawaan asli dari Windows) yaitu sbb:
Video Codec: DivX, FFDS(ffdshow), H.264, AVC, XviD MPEG-4 (hati² ada beberapa versi MP4, Microsoft sendiri/optional punya MP4, dengan nama Microsoft MPEG-4 tetapi minim configuration. XviD-MP4 dan Microsoft-MP4 adalah salah satu diantaranya yang support format MP4 versi HandPhone).
Audio Codec: ADTS, AAC, AC3 (Dolby), m4a (iTunes), RA (real audio), ogg (Vorbis), AMR (low), AMR (high), dll.
Hot Tips: Jika ingin muatan kecil pada suatu Video-file, jangan hanya video/gambarnya saja yang di-compress pakai Video codec, tetapi harus audio/suaranya juga ikut di-compress pakai Audio codec spt MP3, MP4, sebab kalau pakai WAV muatannya pasti tetap besar, sebaiknya WAVnya di-conversi dulu pakai MP3 atau MP4[biasa dikenal AAC buat audionya, HandPhone model baru² sekarang sudah bisa playback format MP4 + bawaan AAC ini]. Maksudnya jangan hanya editing video atau editing film, tetapi harus diperhatikan juga yang lainnya.
Perlu diketahui hasil kompresan MP4/AAC (sesama sampling freq 44100Hz) kualitas suara masih lebih bagus dibanding dengan MP3. Jadi walaupun kita melakukan edit movie atau transfer film bisa jadi hasilnya tidak kalah dengan aslinya.
Sebagai Tambahan-Akhir: untuk PC walaupun kita proses suatu file MP4/AVI (yang umum) tapi audionya AAC, jangan kuatir bahwa di PC lain mungkin Anda ragu tidak jalan karena tidak adanya codec AAC, pada hakekatnya tetap bisa support karena ngikut dari bahagian utama sebagai bawaan dari gambar/Videonya, sama halnya bila suatu AVI dikaitkan dengan AC3. Nah pada HP ada sedikit perbedaan, ada kekecualian beberapa type HP walaupun di-proses MP4 + audio AAC akan tidak bersuara/hanya gambar saja. Hal ini karena HP tsb memakai OS tersendiri (OS firmware/pabriknya). Adapula yang pada manualnya tertulis support AAC, akan tetapi kalau kita lebih teliti menelusuri demonya via Computer itu sebenarnya di-encode pakai audionya 3GP yaitu AMR(versi low) yang kwalitas suaranya rendah dan extension AMRnya bisa tetap jalan sekalipun di-rename dengan nama AAC. Dan yang bagus adalah HP dengan OS under Symbian + under Windows pocket/PDA phone ataupun OS Palm, ketiganya support MP4 + AAC. Ada juga beberapa HP walaupun tidak menganut paham Symbian kecuali beberapa type seperti Sony Ericsson support juga MP4 + AAC(kelas middle mulai series K dan seterusnya keluaran th 2005 kwartal I keatas).

Color Correction for Video


Steve Hullfish, Jaime Fowler - Color Correction for Video, Second Edition: Using Desktop Tools to Perfect Your Image
Publisher: Focal Press | 2008-10-27 | ISBN: 0240810783 | File type: PDF | 296 pages | 51.36 mb

Seharusnya buku ini saya informasikan sebelum buku "The Art and Technique of Digital Color Correction". Berisi tentang langkah demi langkah instruksi untuk berbagai konsep color correction dan solusinya. Ada baiknya anda membaca buku ini sebelum membaca "The Art and Technique of Digital Color Correction".

DOWNLOAD BUKU DISINI! (51,36 MB/pdf) 

Jumat, 12 November 2010

Buku : The Art and Technique of Digital Color Correction

Kalau mau belajar soal color correction, ada baiknya baca buku ini. Buku yang di tulis oleh Steve Hullfish mengulas semua masalah warna dalam video. Dalam buku ini tidak membicarakan color correction dengan menggunakan satu aplikasi atau plugin tertentu saja, tapi penulis membahas secara umum sehingga bisa di terapkan dalam aplikasi manapun. Masalah bahasa mungkin jadi sedikit kendala untuk mengerti apa maksud si penulis. Tapi demi menimba ilmu... Gak ada salahnya toh, kita bersusah payah sedikit. :)


After Effects Expressions #6

Lesson 6: thisComp

There are some useful terms to learn that we can use to get a great deal of information about a composition, as well as the elements inside the compostion. Please note that all of the examples are CASE SENSITIVE!!

thisComp.height

This returns the height of your comp in pixels. For example, for a NTSC D1 composition, thisComp.height would be equal to 486.

thisComp.width

This returns the width of your comp in pixels. For example, for a NTSC D1 composition, thisComp.width would be equal to 720.

thisComp.numLayers

This returns the number of layers in your current composition.

To demonstrate a simple example, let's consider the following expression as applies to Position:

x = value[0];
y = thisComp.height/(thisComp.numLayers/index);

[x,y]

Two-dimensional position is array, therefore it has two values: one for x and one for y. To have X position be freely editable in an expression, using 'value[0]' will leave the existing x position (position value number "0").

Next, we declare a calculation for Y. The value of the comp height divided by the number of layers in the comp divided by the index. Recall that 'index' is equal to the current number of the layer.

If we plug this expression into Position for just one layer (with only one layer in the comp), it will position the layer at the bottom of your composition. For example, 486 / (1 / 1) = 486.

However, if duplicates of this layer are made, each one will automatically distribute itself equally in Y.

Some other useful uses of this comp are as follows:

thisComp.duration

Returns the length of the comp in seconds.

thisComp.frameDuration

Returns the duration of one frame in time in seconds. 1/thisComp.frameDuration would return your current frame rate.

After Effects Expressions #5

Lesson 5: Modulus with If/Else

Here's a real example that came up recently that showcases the beauty of expressions. This example involves creating charts that are driven with Expression sliders. In doing so, we'll find some interesting quirks that we'll solve with expressions, that otherwise would be almost impossible to achieve.

What we are going to create is a bar chart. The area of the bar is going to be driven by an expression slider, as well as the data label. The example that I am taking this from is a 3D bar chart that I created for some sales presentations for WDIV NBC.

For our example here, make a simple solid that is 50x300 and a simple piece of text that says anything.. mine says "value".


Now, create a Null (Layer>New>Null Object). To this Null, apply the effect: Expression Controls> Slider Control. Your layers should look kind of like this:


Despite the fact that a Null is invisible, Expression Controls have absolutely no visible effect on their own. They exist only to serve as "controllers" for us to use exclusively with Expressions. The Slider Control is an keyframeable number slider providing number values for you to use with Expressions.

What we want to do is have the Expression Slider drive the Y scale of the solid, and the text label. The easiest way to do this is to utilize the "pickwhip". I've purposely waited until the fifth lesson to even discuss this, as to not make you too dependent on it. The pickwhip is the little swirly icon to the right of the parameter that appears when you create an expression. The purpose of the pick-whip is to allow you to "grab" any value from any parameter. The result is that the code that you would need to enter.

To drive the scale of the solid from the Slider, first create an expression for the scale of the solid (opt/alt click on the scale parameter). What we want is for x-scale to be left alone, and y-scale to be driven by the slider.

x = 100 ;
y = thisComp.layer("Null 1").effect("Slider Control")("Slider");
[ x , y ]

The code for "y =" is simply retrieved using the pickwhip, with a semicolon at the end, like this:


Here, I typed everything out first, before entering the code from the pick-whip, to illustrate things more clearly. Notice that I PUT THE CURSOR WHERE I WANT THE CODE TO GO. Don't forget to put a semicolon, either.

You'll see now that dragging the Expression Slider on Null 1 makes the scale of the solid change, but the anchor point is in the wrong spot and needs to be moved to the bottom (double-click the solid layer and move the anchor to the bottom). After moving the anchor, you'll have to reposition your solid, as you'll notice that it has moved.
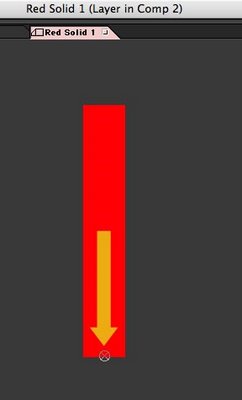

Next, the type needs to be driven by the slider, too. Twirl open the type layer, and locate the "Source Text". Create an expression for this and drag its pickwhip to the slider as well.


What you'll see is that the bar and data label now work in sync, driven by an expression. GREAT! But, there's a couple problems. First, try this: animate the slider value from 0 to 50.

The value of the data label is reflecting the extreme accuracy of the Expression Slider by showing a great number of decimal values. We want to round that off.

Let's learn a new term:

Math.round(value)

Simply put, Math.round rounds what is inside the parantheses to the nearest whole number.

In our example, declare the code that we got via the pickup to be equal to a variable, like this:
sliderVal = thisComp.layer("Null 1").effect("Slider Control")("Slider");.

At this point, we could round this by using "Math.round(v)". However, what that would do is round v to the nearest integer, but we should get this to tenths as we should show a little more accuracy. To do this, we need to use a common Javascript technique thata goes like this:

Math.round(value*10)/10

Within Javascript/Expressions, this does exactly the trick. Multiplying the number to be rounded by 10, then dividing by 10 will round the number to tenths. Pretty cool.

But notice one more problem, and this stumped me for a bit. On integer numbers, there are no tenths. Javascript has no reason to show them whatsoever, as "25.0" and "25" are identical to a computer. But, aesthetically, we would want our numbers to ALWAYS be in tenths, rather than jump around from tenths to whole numbers and back again. You'd think there would be a very easy way to do this, but there really isn't.

To figure out how to do this, we need to learn about one more thing: "modulus". Modulus is an "operator", just like plus, minus, divide, and multiply ( + - / *). Modulus is expressed with the following term:
%

What this does is return the remainder after dividing two numbers. For example:

17 % 5

This would return "2". 17 /5 = 3 with a remainder of 2.

10 % 5

This would return "0". 10 /5 = 2 with a remainder of 0.

SO, let's think out our decimal problem in plain English:

If the value of the expression slider is integer,

then we need to add a ".0" to the end of the number.

otherwise,

leave the number alone.

So, we have our variable, I'll use 'sliderVal' in this case:

v = thisComp.layer("Null 1").effect("Slider Control")("Slider");

We need to check to see if this number is an integer or not. I did this by doing this:

check = v % 1

I declare the variable "check" to be equal to the remainder of y divided by 1. If check is "0" the number is integer, if not the number is non-integer. See where we are going with this? Let's cut to the chase and show the code:

sliderVal = thisComp.layer("Null 1").effect("Slider Control")("Slider"); v = Math.round(sliderVal*10)/10;
check = v % 1

if (check == 0){
"" + v + ".0"
}else{
v
}

OHMIGOSH, you might be saying. Don't panic.

First, we have a variable with a bunch code that we got by using the pickwhip. Don't even worry at this point what it all means:

sliderVal = thisComp.layer("Null 1").effect("Slider Control")("Slider");
Then, we round sliderVal to tenths:

v = Math.round(sliderVal*10)/10;
Next, we test to see if we have a number that is integer (with no decimal) or non-integer (with a decimal). We do this by declaring a variable to be equal to the remainder of the result of v divided by 1, which is expressed as:

check = v % 1
Next, think back to the format of if/else:

if (condition){
result1
}else{
result2
}

The condition we are checking for is "if (check == 0)".

You may be asking, what's with the "=="? In Javascript/Expressions, when we declare something, like "x = 5", we obviously use a single equals sign. When we are comparing two different values, like "if (x == 5)", then we use two equals signs.

If the condition is true, then we move to result1:

"" + v + ".0"

What kind of jibberish is this?

Here, we are working with text characters. Just like we can add "5+5" with numbers, with text we can add 15 + ".0" to create 15.0 Keeping this in mind, using v + ".0" would add a ".0" to the v. That all makes sense. What's with the double-quotations ""?

In Javascript, when we are adding characters together (like the ".0") we need to say right up front that we are going to be adding characters (not numbers) together. Being that Expressions start at the left and move to the right, on the leftmost part of the expression, we need to to start right off with some empty type "" and then continue adding our type together.

Remember, Expressions are efficient and do not want to display a ".0" so we are just ADDING the text of a ".0" on the end of numbers that do not have it. Also, we could add any sort of characters like "$" or "%" to this as well.

Moving on, we have our result2:

v

This is simply the rounded value. We don't need to do anything to it.

Then, we close our bracket:

}
Granted, it took me about 30x as long to write this tutorial than to come up with the logic and expression to fix the little chart anomaly. So, if this seems overly complicated for something simple, it really isn't. The code is small, works perfectly and isn't that hard to wrap your head around.

After Effects Expressions #4

Lesson 4 : If/Else

In previous topics, we've covered some basic ways to define or modify parameters using After Effects expressions. But let's do something a little more complex to start harnessing the practical side of expressions.
What we discussed in prior topics was how to create some values based on time, or index. But, these values were always absolute. There is nothing telling After Effects that "if this value reaches a certain point, then do something else". This is exactly what if/else is for.
Consider the following example. Put this on the position of, perhaps, a type layer.
xPos= time * 200 ; yPos = position[1] ;
[ xPos , yPos ]

If you've been reading the other blogs, this should mostly make sense, but let's review.
We declare a variable "xPos" to be equal to time multipied by 200. Remember, time is the current time of the AE playback head or "CTI". As the time in the comp time becomes greater, the value of the term time increases. Therefore, as time in the comp progresses, the text moves in a postive direction in the X axis.
Next, we provide AE with the values that we want our position to be. Unlike parameters like opacity that are defined by one number, position is defined by multiple numbers (x and y, in this case), which we call an array. When we provide AE with the values for an array, we need to use this kind of format:
For a 2d layer:
[ x , y ]
or for a 3D layer:
[ x , y, z ]
So in our example, [ xPos , yPos ] is providing the x and y values.
xPos =========> is X
yPos =========> is Y
position[1] is just like value[1] that we've covered before, just specific to position. So, position[1] is the exisiting Y value that you can modify.
What were we talking about? Oh yeah, if/else.
What if we wanted this movement to stop at, say, a value 200 in the x axis?
In plain English (as that is what I speak), I would say:
"If the position of my object is less than 200, then keep moving, otherwise stop".
The way we say this in expressions is like this:
if (condition){ result1 }else{ result2 }
AE will not even look at anything beyond line result1 if the condition is true. When condition is not true, AE will ONLY be concerned with result2. It's always going to look at result1 OR result2, never both with if/else.
So, for this to work with our example, this would be the code:
xPos= time * 200 ;
yPos = value[1] ;
if (xPos < 200){
[xPos, yPos];
}else{ [200 , yPos ] ; }

Let's take this apart. First we declare our variables:
xPos= time * 200 ; yPos = value[1] ;
Then we have:
if (xPos < 200){
which means: If the condition of xPos being less than 200 is true... then the result is:
[ xPos , yPos ];
However, if it is not true..
}else{
Then set the x position equal to 200, and y position to yPos:
[200 , yPos ] ;
Then close the brace:
}
As xPos increases, our type's x position increases. When xPos is over 200, the type's x-position becomes fixed at 200.
You might be a little overwhelmed by a lot of things that look unfamiliar, like these { and } braces. When using an if/else condition, we have two possible results: if the condition is true do result1, else do result2. Both of the results must be enclosed with these { } braces, even if on different lines. We can right this several ways, like:
if (condition)
{result1}
else
{result2}
But, the first way of writing it is more common, as result1 and result2 are not limited to one line of code, they could be a complex computation, and becomes easier to view if the brackets are pushed out of the way. ALWAYS REMEMBER.. never put one brace { without closing it with another brace }.
Give that a try and check back for more expression topics!

after effects expression #3

Lesson 3: Value

In this lesson, we are going to explore the term value. In short, value returns (or "gives you") the current value of whatever parameter which with you are working.
So, if we were to use the following expression on opacity:
value + 5
The opacity is still modifiable, because the expression is getting the current value of the parameter as is, and then adding 5 to it. value always leaves your parameter modifiable, but with the ability to combine different calculations with it.
For example, using our simple Opacity scenario, try adding the following expression:


This will result in opacity gradually increasing the opacity over time. But unlike before, you'll notice that we can now modify the value of Opacity. Why is that?
The term value is the current parameter value, as is. This we can change as we please. To this, we add the time.
If we only used the term time, opacity would increase by 1 for every 1 second that passes in the composition, and we would not be able to change the value
So, for an example, let say we wanted to create a name banner that we can move around as we please, but still had movement of its own generated with expressions.. value would allow this flexibility.
Remember my awesome train drawing?


value, when used with an array will have multiple values. To work with these values, we need to specify what value we want. The way we do this is with the [0], [1], etc. Don't forget that it is ZERO that is the first number, not one. So what we would call the first value would be:
value[0]
Second value would be:
value[1]
And so forth.
So, considering the following example, try to predict what would happen.

The X value is free to roam. We can change that to whatever we want, but Y is fixed. So, we've constrained the movement of this object to the X axis.
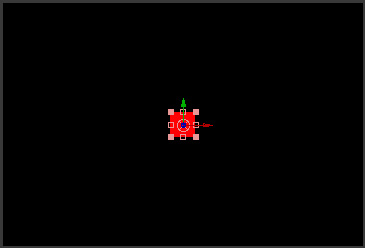
t is an increasing value equal to time multiplied by 50.
x is still modifiable, with value[0], but it is increasing because we are adding t and makes the solid move from left to right across the screen.
y is still locked in at 200.
Notice the semicolons. If you aren't sure when to add a semicolon, add a semicolon. It's just a Javascript thing, and you'll never do any harm in adding a semicolon at the end of a line.
How would we get this to stop at a value? That gets into checking our values with an if/else statement which we will do next time.
Also, some suggested reading:
Dan Ebbert's explanation of Array math
I could spend hours coming up with an explanation of array math and not do as good a job as Mr. Ebberts. You'll notice some new things like position[0] which I haven't described. I wanted to start with value first, as it is more universal and requires fewer terms for you to remember. In short, value[0] on position is exactly the same as postion[0]. We'll get to that next time.

“Save Google Maps as images”

Google Maps Saver  


Google Maps Saver is a simple viewer that lets you use Google Maps just as if you were in your web browser, only with a very interesting additional tool: the ability to save loaded maps as images, so that you can use them offline or take them anywhere with you.
Using Google Maps Saver is as easy as Google Maps on your browser: simply enter a location and let the system navigate to it. You'll be able to zoom in and out the image, and choose between map style or satellite imagery, just like the original tool. The difference is that you can also pick a resolution (from iPhone 320x480 to huge sizes like 10000x10000), select the target format of your image (JPG and PNG in different qualities, plus BMP and TGA) and finally save the image to your desktop.
Google Maps Saver is simple, efficient and does what it says on the tin. That said, I must admit I was a bit disappointed when I realized that the program adds a watermark to saved images. Luckily you can remove it by simply accepting the license agreement you can find by clicking the About button in the top right corner.
Google Maps Saver is a handy, easy-to-use tool that lets you save Google maps to your desktop, in a variety of formats and resolutions.

Languages:

English

Google Maps Saver supports the following formats:

JPG, PNG, BMP, TGA

OS requirements for Google Maps Saver:

OS: Win2000/XP/2003/Vista/7 
Compatible with Windows 7

Download Google Maps Saver

After Effects Expressions #2

Lesson 2: Arrays and Variables

Previously, we covered how to use some basic expressions using opacity. Opacity has a single value, as it is defined as a one number from 0 to 100. But not all parameters are that simple. For instance, consider position. This could have 2 or even 3 values... X Y & Z.
So, when I mentioned how we could simply put an expression that said "5" for opacity to make the opacity a value of 5, that was easy enough. But, the parameters that have multiple values make things trickier.
First off, let's learn the lingo. A parameter that has more than one value is called an "array".
First off, check out this AWESOME picture I drew. Yeah, it's pretty much the best drawing I ever made.

Think of an array like one big train. Instead of hauling freight and hobos, it is hauling numbers. Each compartment is separate, but in a distinct order. In the case of 3D position, we have XYZ as the values you might want to call 1 , 2 , & 3. We'll learn later on that AE logically refers to values 1 2 & 3 as 0, 1 & 2.
So, the easy example that we had with opacity gets trickier here. There's a fairly specific way we need to define arrays in expressions, and that goes a little something like this:
[ x , y , z ]
So, to define simple numbers for these values, the following expression shows you how to place an obect at 100, 200, 300 in 3D space:
[ 100, 200, 300]
The brackets are absolutely necessary and AE will return an error if you don't put them there. Spaces are mostly ignored, however. I use a lot of here to make things easier to read.
Now, for a few new concepts:
First, the "variable". A variable is simply an 'unknown value' that we want to calculate or assign a value to. Look at the following example.
x = 100
y = 200
z = 300
[ x , y , z ]
This has exactly the same result as the first expression: [ 100, 200, 300]. We are just presenting it in a different way. Variable are often handy just like we use pronouns. I could say Rufus Xavier Sarsasparilla.. or I could say "he" once I establish who "he" is.
In exactly the same way, I can declare a variable to be a number, or calculation or any number of things and refer to "x" rather than using the calculation every time. This makes the code shorter, less cluttered looking, and faster for AE to go through.
Variable names can be any set of characters that AE does not use as a specific function. For instance, we cannot use the word 'time' as a variable. But we could use myTime, or hammerTime, or millerTime. When using multiple variables in a project, it is useful to use variable that make sense, like "posX" or "startTime". You'll come up with your own style, but just know that variables can be "x" or "x1" or "xFactor" or "myReallyLongVariableName". It's up to you.. they do not have to be "x" or "y" or "z".
One more term to learn today: index.
index is equal to the actual number of the current layer. So, depending on what layer your expression is on, the value of index will vary. If you are in layer 1, index will be equal to "1", in layer 2 index will be equal to the number 2.
So, how do we use this? Here's a great example.
Create a solid that is 50x50 and make it a 3d layer.

On the position of the solid we just created, place this expression:
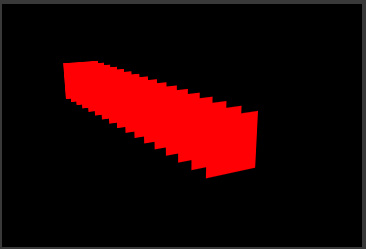
z = index * 20;
[320 , 240 , z ]

We are setting the variable "z" to be equal to the index of the layer times 20. Notice the semicolon at the end. ANY time we are using a calculation with a variable, we MUST put a semicolon at the end, otherwise you will get an error.
The next line:
[ 320 , 240 , z ]
...positions the solid at 320 in the X and 240 in the Y. But, it's Z position is now dependent on the layer number. Try selecting the solid, and hitting "duplicate" several times (command/control-D). You'll see that each copy positions itself in a different spot in z space.

That wraps it up for now. Next time we'll explore how to leave the X , Y and Z values adjustable in this example, while still having the layers spaced in Z.

After Effects Expressions #1

Lesson 1: The Basics

In After Effects, an expression is a Javascript based script in that can either modify a parameter or drive the parameter entirely, like position, opacity, or perhaps a Gaussian blur level. We can add an expression to any parameter that has a stopwatch icon next to the parameter. The exclusion to this rule are Masks parameters like Mask Shape, Mask Feather, etc.
The key to getting the whole AE expressions thing is to start learning the lingo. So, from time to time, I'd like to try to cover some of these expression terms to get you out of using the pick-whip, and using your noodle to create your own.
Let's start with opacity.
To create an expression in After Effects, you simply hold down the alt (Win) or option (Mac) key and click the parameter. After Effects is then waiting for you to enter brilliant code to tell this parameter what to do. So, let's try this.
Create a solid layer, hit "T" to show its opacity, then opt/alt click the Opacity stopwatch. Now, the text field, enter:
5
Opacity then becomes 5. Pretty simple, huh?
How about:
5 + 5
Opacity then becomes 10.
Expressions are aware of just about any kind of math you want to throw at it.. including + - / * and other weird things like modulus % and even trigonometry, but that's WAY down the road.
Let's throw in another expression term: time. Any time we use the word "time" in an expression, time will be equal to the current time of the composition playback head in seconds. So, if you play your comp from the beginning, time will start at 0 and increase 1 for every second that passes.
If we add this expression to opacity:
10 + time
Opacity will start at 10 and increase by one every second. Note that once the values go beyond 100, the value remains at 100.
Let's try multiplying.
time*100
Things were moving pretty slow before. This picks up the pace quite a bit. We are simply using time multiplied by 100 as the value for opacity rather than using keyframes.
What if we wanted this to start at 5 seconds? There are more elegant ways to do this, but let's do this the easy way:
(time * 100) - 500
Time keeps moving on, ya know. So, at 5 seconds, (time * 100) will be equal to 500. Again, opacity treats any value over 100 as 100 and any value below 0 as 0. So, if we subtract 500, the opacity will not start changing until 5 seconds.
One thing that I don't want to skip over is the parenthesis. Remember back to basic math class... mine was with Mrs. Fleeger. There's an accepted way that we calculate things. Often people use the term "BEDMAS" to remember this. This means that the order we calculate our equation is in this order: brackets (or parentheses), exponents, division, multiplication, addition, subtraction.
The reason I bring this up is that in the above example, we have some parenthesis. The items inside the parenthesis will get calculated FIRST. Then that calculation will have 500 subtracted from it. For example, at 3 seconds we would have:
(3 * 100) - 500 = (300) - 500 = -200
As I mentioned, negative opacity values are treated as 0. We cannot have a negative opacity obviously. This value will continue to be negative until we reach 500 inside the parantheses, which is 5 seconds.
Absorb that for now, and then next time I'll cover Array values like Position and Scale. Don't know what that means? Then check back.

MORPHING IN AFTER EFFECTS

---Introduction---

Morphing is a distinctive effect that is best known from the movie Terminator 2 as well as the Michael Jackson music video Black and White. After Effects can do simple morphs with the Reshape filter - which is a Production Bundle only effect found under the Distort menu. Basically, a morph consists of one image changing its shape over time until it becomes another image. Morphing can be used as a visual effect - for example an actor may morph into an alien - or as an invisible technique - for example to change the perspective of a miniature so it can be composited more accurately with live action.
The morphing effects in Terminator 2 were sophisticated 3D models which altered their geometry in 3D space, and there is no way to achieve that level of sophistication in After Effects. However, simple morphing with 2D images is fairly straightforward, and if you're familiar with basic After Effects procedures they can be completed fairly quickly.
A simple morph effect is actually three events happening concurrently:
  1. The shape of the original image (the "source") is warped over time to become the same shape as the final image (the "destination")

  2. The final image (the "destination") begins warped to match the "source" image, and it un-distorts over time until it resumes its normal shape.

  3. The opacity of the layers changes over time, so the destination image becomes visible over the source image as they are both distorting.
If you are planning to shoot footage for a morph effect then the subjects should be shot greenscreen so they can be isolated on a transparent background. During a morph effect, the shape of the image is being altered. Unless the subject is isolated then elements in the background can also be distorted and warped which will undermine the appearance of the overall effect. While the Reshape effect can be limited to certain parts of your image by using a "boundary mask" (see below), it is still much easier if your subjects begin as keyed elements. Once the final morph is completed, then the rendered effect can be composited into a background plate.
A really good morph will have source and destination images which are similar - not only in subject matter but also in composition. A morph of one actor into another will be much more effective if they both have the same stance and position in frame. Wildly different images will almost certainly give poor results.
To demonstrate this process, we'll do a simple morph of a human into a sheep - I already had some greenscreen footage of a sheep from a TVC, and Jock (the editor from downstairs) volunteered to help before he knew what it was for.
To make the morphing process as easy as possible, I prepared the source and destination footage so they would be as similar as possible. I keyed both elements, positioned them in frame so they occupied that same area of the screen, and used time-remapping so that their actions (turning their heads) matched as closely as possible. By using greenscreen source images, it is much easier to change the position and size of one subject to match another, because we don't have to worry about the background.


---The Tutorial---
In order to minimize file sizes for the Internet, the source footage files were rendered with separate alpha channels. You will need to re-combine these in After Effects before beginning the tutorial – applying the alpha channel movie as a luma track matte for the respective footage file. You could continue the tutorial using these as precompositions, but for simplicity I recommend rendering them out as uncompressed Quicktimes. A project file to do this for you has been included as part of the tutorial.
Begin by opening After Effects and importing the two Quicktime files: Jock-Source.mov and Sheep-Source.mov.(Download all the footage with the project file above in the green bar.)
In the project window, drag one of the footage items onto the composition icon at the bottom of the window, so it creates a new composition at the same size and frame rate as the source file. The composition should be 320 x 320, square pixels at 25 fps.
Change the composition settings to have a duration of six seconds, and then drag the other footage file into the composition. I called the composition "Reshape-Morph project"


Arrange the footage items so that the bottom layer is Jock, beginning at frame 0, and the top layer is the Sheep, starting at the three-second mark. There should be a one-second overlap, which is where the effect will take place. To make things simpler, split the Jock layer at the 3:00 point, then go to the four second mark (4:00) and split the Sheep layer, so our effect can be applied to layers only as long as it's used. From this point on, when I refer to the “Jock layer” and the “Sheep layer” I am referring to the one-second layers, and not the other, longer clips.


Click on graphic to view larger image.

The first step in creating our morph effect is to create a mask around our object. Turn off the sheep layer and go to the 3-second mark where the Jock layer begins.
If you select the Jock layer in the timeline, pressing "i" will take you to the in-point. Using the pen tool, draw a mask around Jock and make sure it's closed. I find that it's easier to draw a mask when the image is greyscale, so I click on the green button at the bottom of the composition window so I'm only looking at the green channel. You may also find it easier if you zoom in to 200% or even more.

Because Jock moves during the one second, we need to animate the shape of the mask to match his movement. Press "m" to reveal the mask properties in the timeline window, and click on the stopwatch. This will add a keyframe which records the shape of the mask at the 3:00 point.
It's important to note that we only need masks to define the shapes we're going to morph - we don't need our masks to act as masks which cut out the background. So where it says “add”, select "none" from the mask menu to turn off the mask, otherwise we will be clipping fine detail from the edge of Jock's face. Clicking on the name of the mask – which by default is “Mask 1” and then pressing "enter" will allow you to rename the mask to avoid confusion later, so call it "Jock shape".


Press the "o" key to go to the out-point of the Jock layer, which is 3:24. Using the selection tool, adjust the mask to match Jock's position in this frame. He hasn't moved very much and it's really only the profile of his face which needs to be changed. After Effects will automatically add another keyframe for the new mask shape, and it will animate the shape over time.
If you scrub in the timeline, you will see that as the mask animates over the one-second period, it matches Jock pretty well. We don't need to adjust the mask any further.
The next step is to do the same thing for the sheep layer. Draw a closed mask around the sheep, enable mask animation with a keyframe at 3:00 and then move to 3:24 and adjust the mask to match.

Unlike Jock, the mask with only two keyframes doesn't fit the sheep that accurately as it animates, so at 3:10 and 3:20 you will need to tweak the shape of the mask to match the sheep's movement. Rename the mask to "Sheep Shape" and ensure the mask mode is “none” and not “add”.

Once we have masks which outline our two subjects and animate over time to match their movement, we can begin on the actual morph effect.
Copy and paste each mask onto the other layer, so that both our layers have both masks. Rename the layers once you've pasted them (they default back to “Mask 2”) and turn them off by selecting "none" from the mask menu.

In the composition window, you should now see the shapes of the two masks overlapping our footage items.

Turn off the visibility of the sheep layer, select the Jock layer and apply the Reshape effect from the "Distort menu".
The first thing we need to do is change the defaults. Change the "source mask" to "Jock Shape". This is our starting point - we are defining which parts of the image we want to morph.

Change the "destination mask" to "Sheep Shape" - we want everything that is inside the “Jock Shape” mask – namely Jock – to be warped into the shape defined by the Sheep Shape mask. Change the boundary mask to "none" - this can be used to confine the area which is effected by the Reshape effect, but because our footage is on a keyed background we don't need to use it. If you use the Reshape effect on images which are not keyed, you may need to add a boundary mask to prevent the background from becoming distorted by the Reshape effect.
The "percent" slide is what we animate to control the morph - and if you experiment by sliding it you will see that we can make Jock look remarkably interesting.

However, at 100% Jock doesn't look as good as he could. This brings us to the most critical aspect of a good morph - correspondence points.
For our morph effect to look great, we want Jock's features to match the Sheep's as much as possible during the transition. We need to tell After Effects which part of Jock will become which part of the Sheep. To do this, we will use "correspondence points" to tell After Effects which parts of the mask around Jock correspond to the mask around the sheep. By default, applying the Reshape effect only gives us one pair of correspondence points, but for a shape this complex we will be needing between 20 and 30 pairs to make our morph look really good.
The quality of the final morph effect depends much more on the accuracy of the correspondence points than the accuracy of the masks.
Adding correspondence points is quite slow, but we can make it easier on ourselves by taking some preliminary actions.

Firstly, we can turn the Reshape effect off by clicking the "f" in the effect window. We don't actually need the effect turned on in order to alter its settings. Secondly, we can turn the layer's visibility off - again, we don't need to see the actual image.

In the “view options” settings under the view menu, turn off the visibility of masks - as we adjust the Reshape filter After Effects will show us the outlines anyway and turning off the masks will aid visibility.

And finally, because the correspondence vectors are black, change the background colour of the composition to grey. None of these steps effect the final morph, they are simply steps which make using After Effects more efficient.

In order to add correspondence points, we need to select the Reshape filter in the effects window. Even though the filter is turned off, selecting it will allow us to adjust it.

In the composition window, we can now see that our two outlines are different colours - red for the source shape and yellow for the destination. The squares on the mask are our first set of correspondence points - and the line indicates the direction that the source shape will take when being warped into the destination shape.

To add a new correspondence point, you need to hold down the "option" key (on a Mac) ("Alt" for Windows) while holding the pointer over one of the outlines. The mouse pointer will change to a pen with a "+" and when you click on the mask outline, a new pair of correspondence points is added. This is pretty slow. When you hold the mouse pointer over a correspondence point, it will change to four arrows to indicate that you can slide the point around the mask into a new position.

Begin with parts of the outline which obviously correspond between Jock and the sheep - for example his chin and his nose. Hold down the "option" key, add correspondence points and slide them into position. You will probably find that After Effects initially has some pretty strange ideas about where correspondence points should go, but just slide them where you think is best. Keep going until you've got the whole shape covered.


Check that your points don't cross, or the image will be twisted.

The outcome of the effect is highly dependent on correspondence points - especially the direction of the vectors. Even small changes to the position of two points can have a very big impact on the outcome.

The fact that the correspondence points are square indicates that After Effects is using linear interpolation to animate them over time.

We can alter this default setting to "smooth" to create a more organic transition. To do this, hold the mouse pointer over a correspondence point and hold down the shift key. Clicking on the point will change it to a circle, indicating that it will now be smoothly interpolated over time.

Work your way around the outline of the shape and change the keyframes to smooth.

When you're finished, you can turn on the visibility of the layer to see how your effect is coming along.

You may wish to adjust the positioning of some of the correspondence points to match features visible in the image. If you turn the Reshape effect on, and set the percent to "100", you can see how Jock is warped to fit the shape of the sheep.


Again, you may wish to adjust the correspondence points if you're not happy with the result. Remember that if you de-select the effect so that you can see the image clearly, you will need to re-select the Reshape effect in the effects window before you can continue to edit the correspondence points.

Set keyframes for the "percent" slider from 0% at 3:00 to 100% at 3:24. This will animate Jock over time so he warps from being himself, into the shape of the sheep.

Click on graphic to view larger image.
Preview the animation, and tweak the position of your correspondence points until you're happy with the effect.
Now we have to do the same for our sheep layer. It is possible to copy and paste the Reshape effect from the Jock layer, but be warned that the correspondence points don't always paste accurately, so usually it's quicker to begin from scratch.
Apply the Reshape effect to the sheep layer and change the Source shape to Sheep Shape, the destination to Jock Shape, and the boundary mask to none.

It's important to realize what we're doing here. The sheep begins as Jock and un-warps back to its original shape. So while Jock animates from a 0% effect to a 100% effect, our sheep layer is doing the opposite - it is animating from a 100% effect (warped into Jock) back to 0%.
As we did with the Jock layer, add correspondence points around the two shapes (by holding down the option key), change them to smooth interpolation (by holding down the shift key), and adjust their position to match corresponding features (by sliding them around the masks). At any time you can turn on the layer visibility and the effect to check your progress, but it's pretty slow.

When you're happy with the results, add keyframes to the Reshape effect so the Sheep warps from 100% (at 3:00) to 0% (at 3:24).

Click on graphic to view larger image.

This is actually as much as we have to do in terms of our Reshape effect. From here on, we're animating the opacity of the layers.
It is easier and certainly faster for us to render out our two layers as separate movies, and continue working on the rendered layers.
In the Reshape effect window, the "elasticity" pop-up determines the quality of the render, at the cost of speed. For the rendering, I chose "loose", but if you have a lot of time on your hands then there's no reason not to use "super fluid". At lower settings, the warped areas can appear pixilated and blocky, although renders are faster. Despite the descriptive nature of terms such as "loose" and "liquid", there isn't a stylistic difference between the different settings - it's the same algorithm just with different levels of precision. Each setting takes approximately twice as long to render as the previous setting.

Set your work area to the duration of the morph - in at 3:00 and out at 3:24. Firstly, turn off the visibility of the sheep layer and only render out the Jock effect, and then turn off the Jock layer and only render the Sheep effect - with the render-settings set to the work area only. I called them “morph components”.

Import both of these files back into the project.

Our current composition contains the Reshape effect, which does the actual warping of the images. We now have two Quicktime movies - one is of Jock being warped into the shape of a Sheep, and the other is of a Sheep un-warping from its initial shape of Jock.
The transition between these two effects is just as critical to the overall effectiveness of the morph. You can do a simple dissolve by only animating the opacity, but the effect can be made much more dramatic by using transitions like ripple dissolves or even FE Light Wipe (if you have it).
To simplify things, we'll set up another composition just to do the transition. In the Project window, select our current composition and duplicate it. Change the name of the duplicate composition to "Reshape - Morph Transition".

Open the Composition and delete the middle two layers which have the Reshape effect applied. Go to the 3:00 mark and drag in our two newly rendered footage files to fill the resulting gap. Put the sheep layer above Jock.
Basically you're re-creating your composition but using the rendered files instead of layers with masks and effects applied.
To reveal the morph, you can use any transition effect you like, but in this case we'll use a gradient wipe so that the luminance of our sheep layer will control the change in opacity. It looks good and enhances the warping effect.
Select the sheep layer and apply the “Gradient Wipe” effect from the Transition menu. In the "gradient layer" pop-up menu, select the second sheep layer- which is the one we've just applied the effect to. This makes the opacity of the sheep layer follow the luminance of the image over the duration of the morph effect. Set the "transition softness" to 50%, or whatever value you prefer.

The effect will animate from 100% at the 3:00 mark to 0% at 3:24 - add keyframes appropriately.

Click on graphic to view larger image.

Because Jock ends up being the same shape as the sheep, the sheep obscures Jock completely by the 100% mark and so we don't need to alter the opacity of the Jock layer at all.

Do a RAM preview to check the transition and tweak to your liking. You might want to "easy ease" or manually adjust the timing of the transition, but otherwise, that's it.


---Suggestions for Advanced Morphing---

What we've just done is a very simple morph, but even in After Effects there are ways to get more dramatic and “high end” results.
In our case, we have defined Jock and the Sheep (that's a good name for a Cop show) by a single mask. Their entire heads and bodies morph together, as a single image.
The next step into making this a more complicated looking effect would be to use our current project as a base, and build up more layers to deal with each feature of their faces. In this way, you could have another pair of layers which only mask their eyes, and other for their ears, and another that might just deal with their noses. In this way, you could build up a complicated effect where Jock’s eye morphs into the Sheep’s eye, his ear becomes the Sheep’s ear, and his nose becomes the Sheep’s nose. You would also be able to individually tailor the rate of change of each of these elements by adjusting the velocity curves of the “percent” slider so each element warps at a different rate.
It all depends on how much patience you have.


---Chris Zwar